|
Zabbix 3.4 : Add Monitoring Target(Windows)
2017/08/27 |
|
Add Monitoring Target. Add a Windows Server 2016 as an example on here.
It's necessarry to configure Windows Firewall to allow 10050 port if you enable it. |
|
| [1] |
Download an binay file of Zabbix Agent on target Windows host from the Zabbix site below.
⇒ http://www.zabbix.com/jp/download.php |
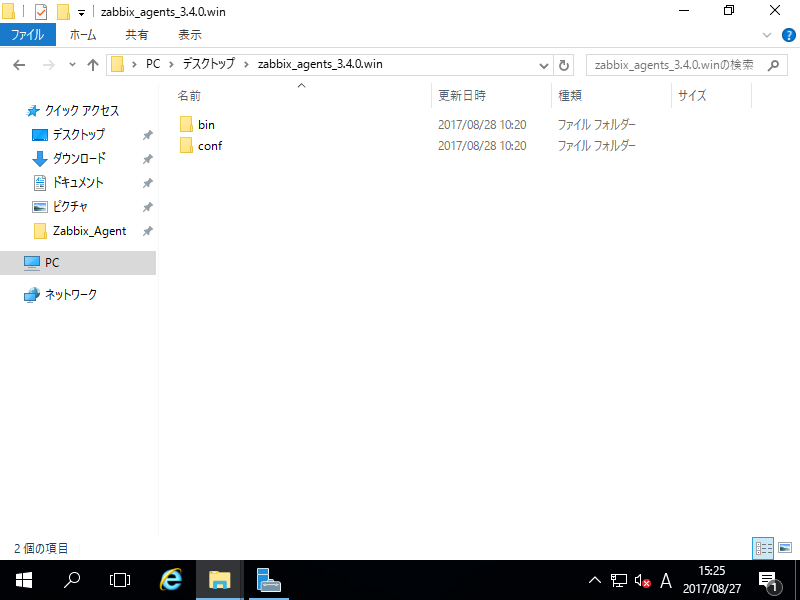
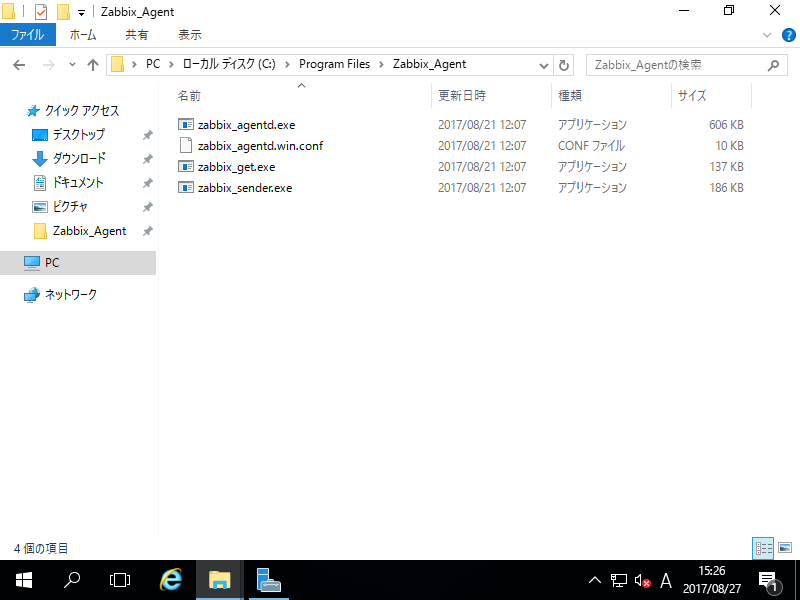
| [2] | After downloading, extract the ZIP file, then [bin] and [conf] folder exist like follows. Copy [zabbix_agentd.win.conf] which is under the [conf] and also copy 3 exe files which are under the [bin] folder into a folder which you'd like to locate them. |
|
| For example on here, create a new folder [C:\Program Files\Zabbix_Agent] and copy files of above. |
|
| [3] | Open the configuration file [zabbix_agentd.win.conf] with a text editor and change parameters. |
|
# line 23: specify the location of log file
LogFile=C:\Program Files\Zabbix_Agent\zabbix_agentd.log
# line 86: specify Zabbix server
Server=10.0.0.30
# line 127: specify Zabbix server
# line 138: specify the own hostnameServerActive=10.0.0.30 Hostname=fd3s.srv.world |
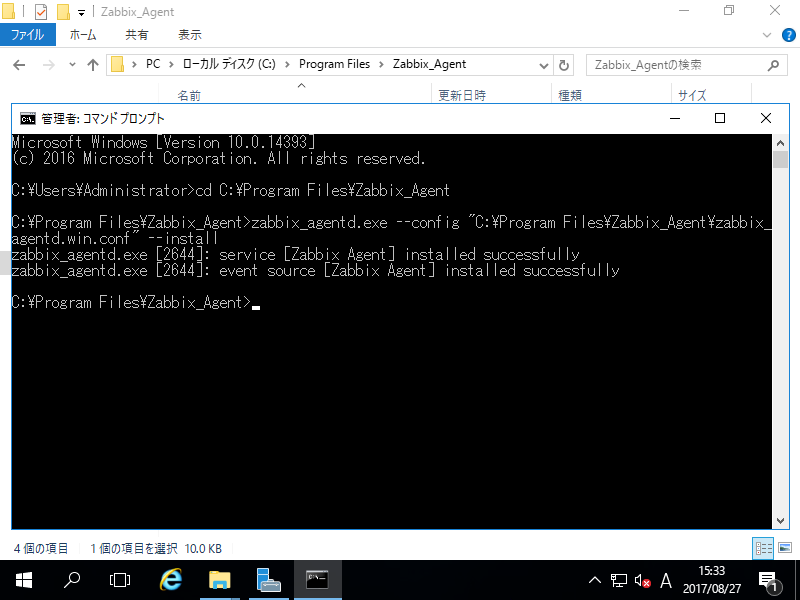
| [4] | Start the command prompt with admin priviledge and iput command like follows. > cd C:\Program Files\Zabbix_Agent > zabbix_agentd.exe --config "C:\Program Files\Zabbix_Agent\zabbix_agentd.win.conf" --install |
|
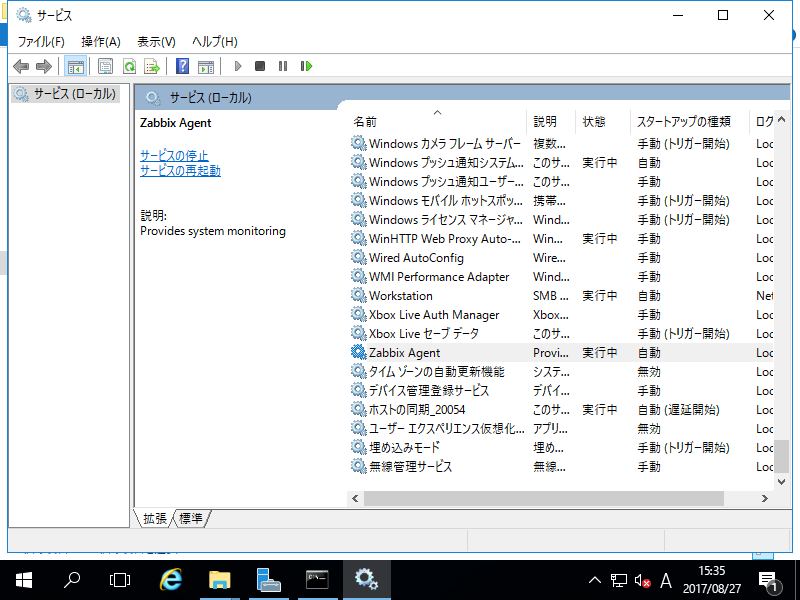
| [5] | After installing, open service management, then [Zabbix Agent] has been just added like follows. Click [Start] to start it. |
|
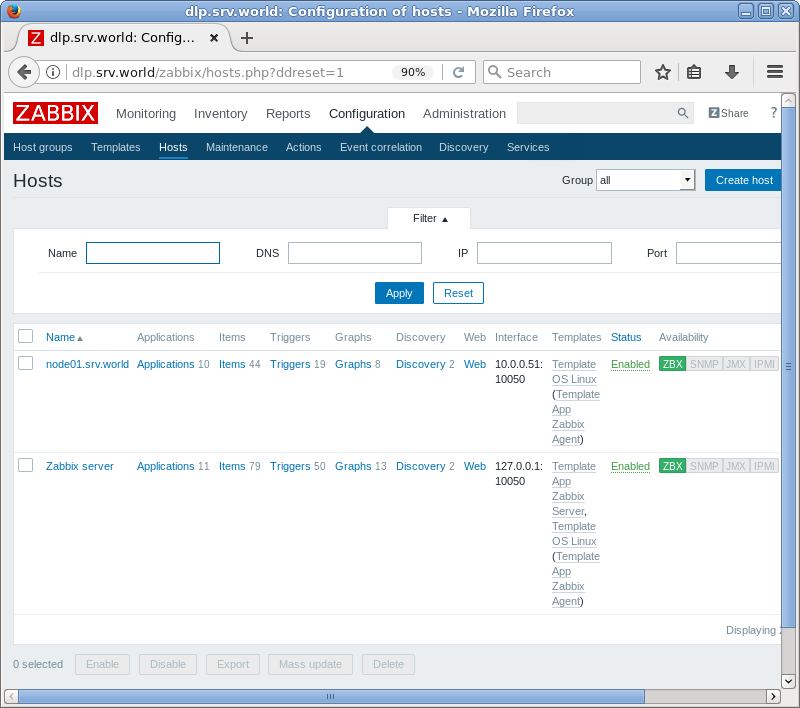
| [6] | Login to Zabbix admin site with admin user and move to [Configuration] - [Hosts] tab, and then click [Create Host] button. |
|
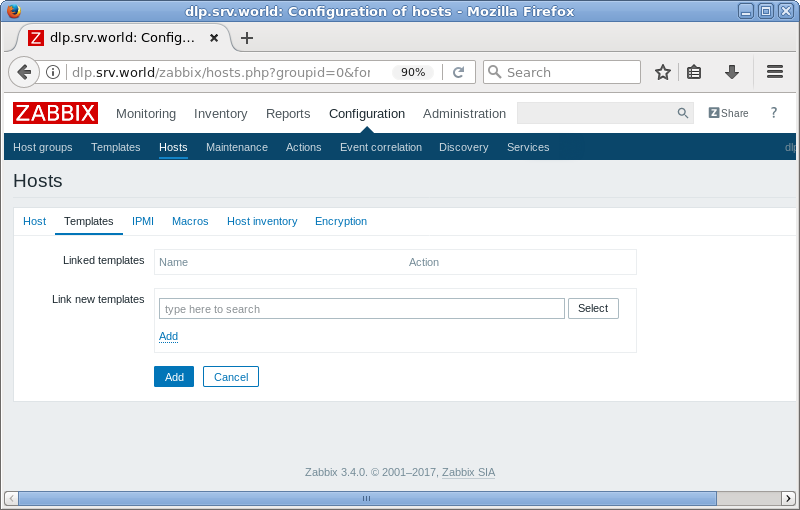
| [7] | Input a hostname for [Hostname] field, input any name you like for [Visible name] field, select a group or add a new group for [Groups] field, input IP address and DNS name for [Agent interfaces] field. For other fields are optional. If it's OK all, move to [Templates] tab. |

|
| [8] | Click [Select] button. |
|
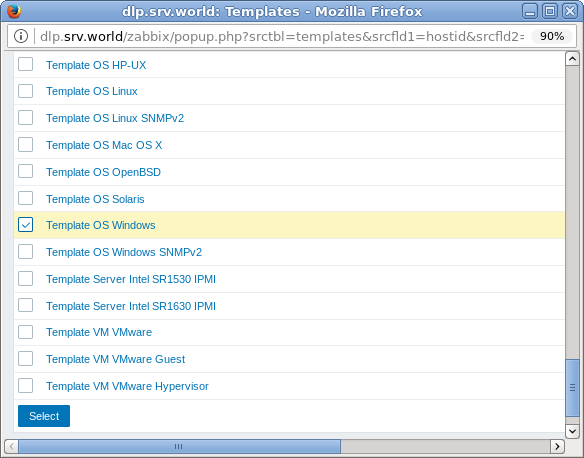
| [9] | Select [Template OS Windows] and click [Select] button. |
|
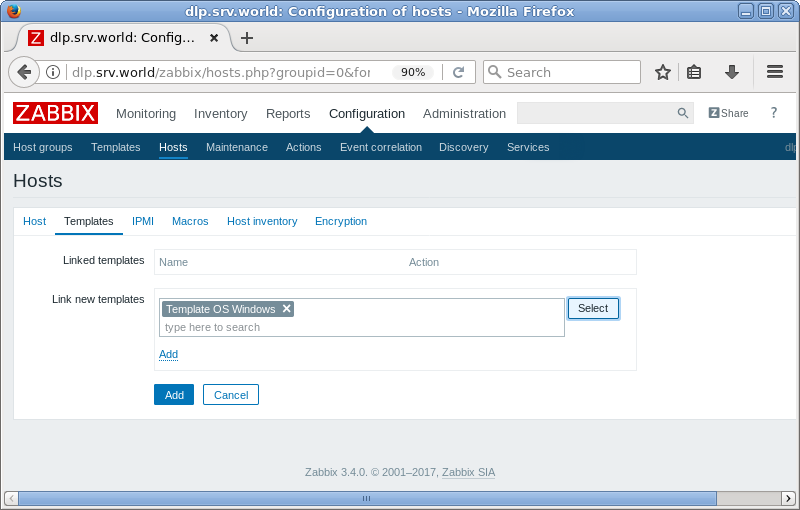
| [10] | Click [Add] link. |
|
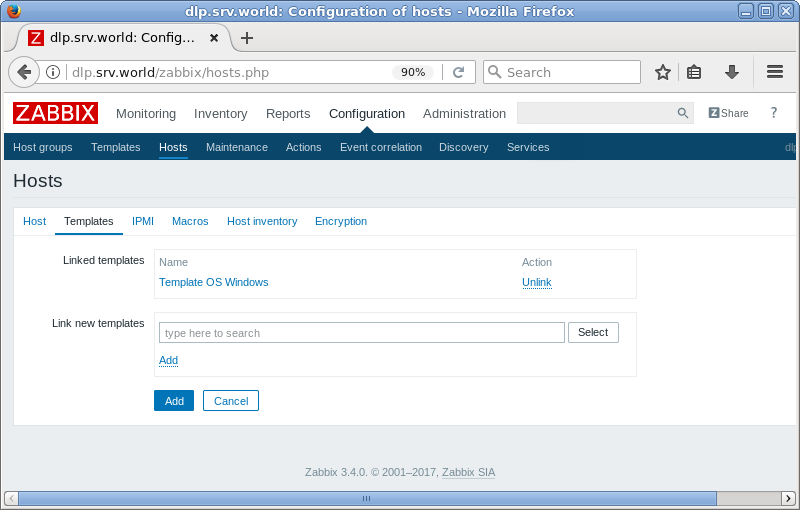
| [11] | Confirm the template added and click [Add] button. |
|
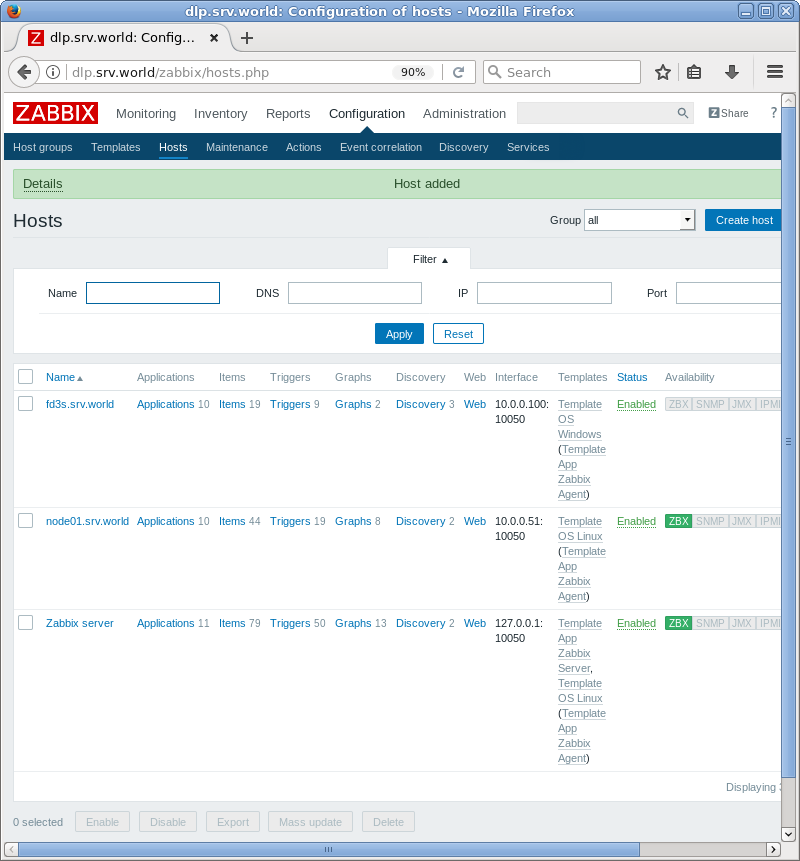
| [12] | New monitoring target host is added. |
|
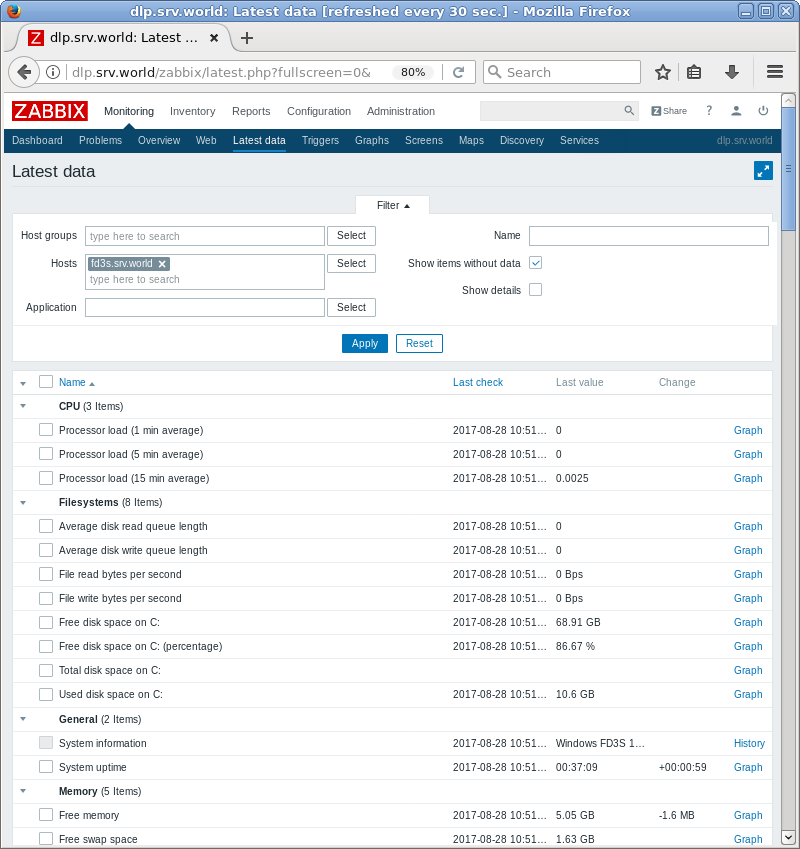
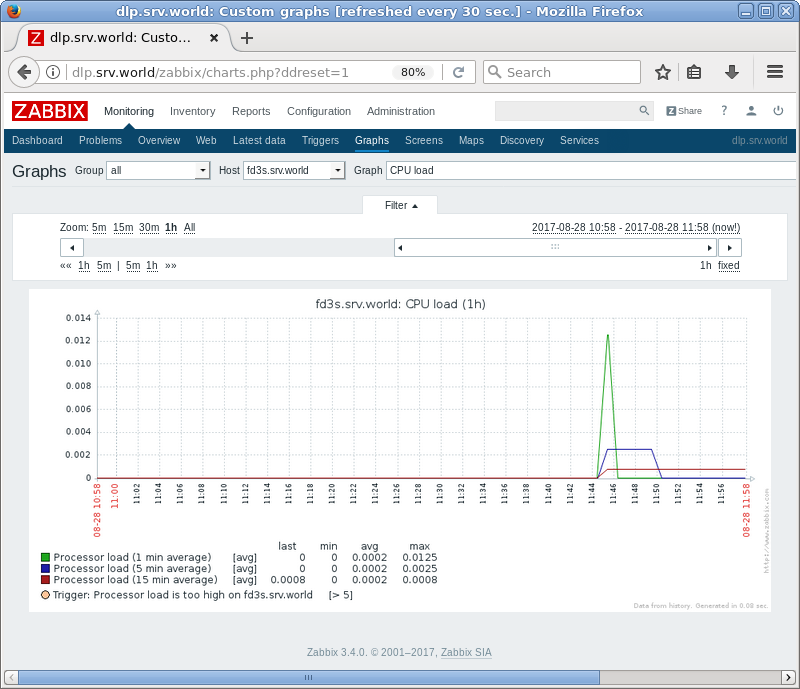
| [13] | After few minutes later, monitoring data is collected like follows. |
|
|